1
From the dashboard, click Tools, then click Scheduled Processes.
The Scheduled Processes page appears.

2
Click Schedule New Process.
The Schedule New Process pop-up appears.

3
Click the drop-down arrow in the Name field. Click the Search link.
The Search and Select: Name pop-up appears.

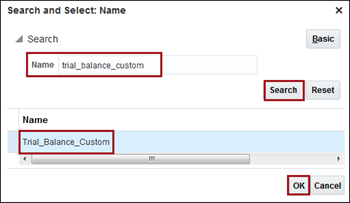
4
In the Name field, enter trial_balance_custom, using the underscores (_), and click Search.
From the search results displayed below, click Trial_Balance_Custom and click OK.
The Schedule New Process window shows the selected process..
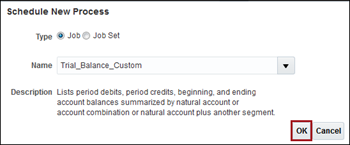
5
The Name and Description fields populate. Click OK.
The Process Details pop-up appears.
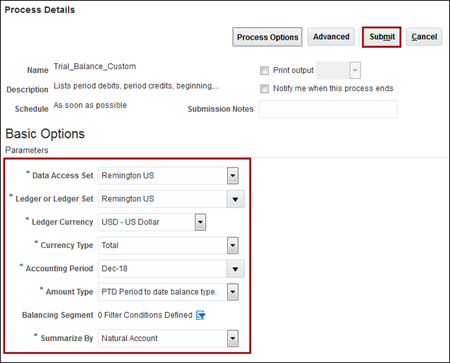
6
Complete the following parameters:
Data Access Set
Ledger or Ledger Set
Ledger Currency
Currency Type
Accounting Period
Amount Type
Summarize By
Next to
the Balancing Segment field, click the Filter
![]() icon.
icon.
The Balancing Segment pop-up appears.
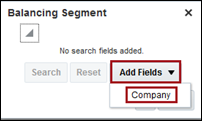
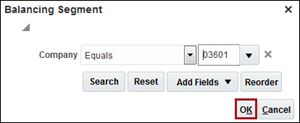
7
Click Add Fields and select Company.
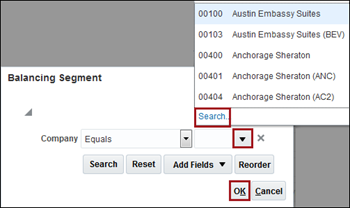
In the second box next to Company, click the drop-down arrow.
Company (or property) options appear, if you do not see your property, click the Search link.
The Search and Select: Company window appears.
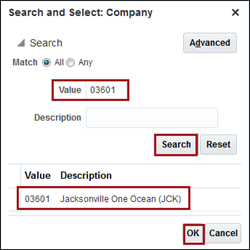
8
In the Value field, type the Company Code associated with your property. Click Company Codes for a complete list.
Click Search.
The search results populate below, double-click the appropriate property. The Search and Select: Company window closes and the Company Code populates in the Balancing Segment window.
Click OK.
The window closes and the filter is applied on the Process Details window..
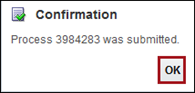
9
A Confirmation pop-up appears.

10
Click OK.
The Confirmation and Process Details windows close.
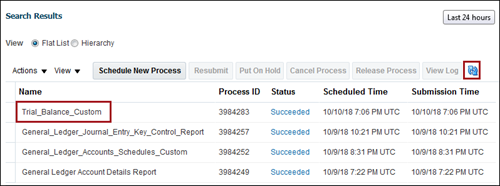
11
Click the Report Name to see the details in the Output section.
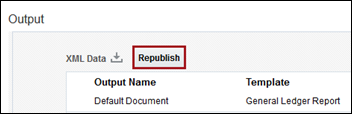
12
Scroll to the Output section and click Republish.
A new window opens.
13
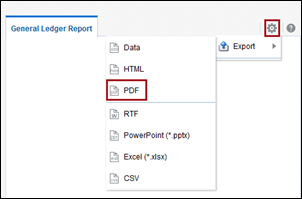
Click
the Settings ![]() icon, click Export,
and select PDF.
icon, click Export,
and select PDF.
A processing loading bar appears in the window, then the Opening TrialBalance_Trail Balance Mockup.pdf pop-up appears.
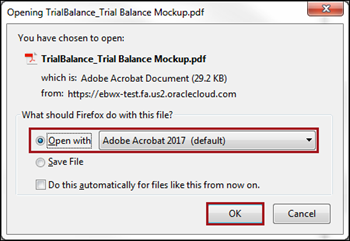
14
Enable the Open with Adobe Acrobat radio button and click OK.
The Trial Balance Report opens in Adobe Acrobat.
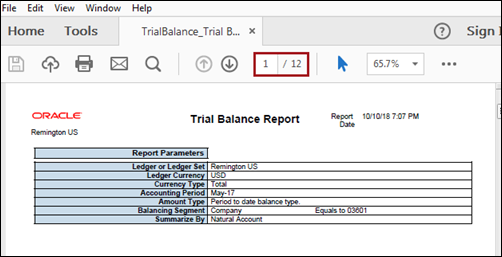
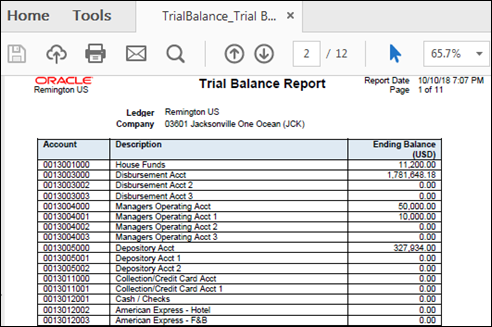
15
Scroll through the pages to view all data.