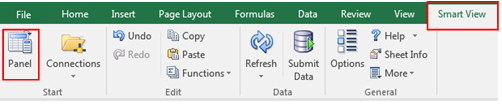
Smart View allows users to rapidly generate Ad Hoc reports with specific information categories. The instructions below show the process to create and configure an Ad Hoc analysis report in Smart View.
To set the shared connection and activate Ad Hoc Analysis, perform the following:
Step | Action | Illustration |
1 |
Open Excel.
(Optional) If Excel requires a file to be open to access the ribbon, open a blank workbook when Excel loads.
Click the Smart View tab and click the Panel option. |
![]() |
2 |
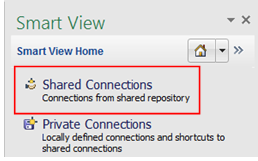
The Smart View panel appears. Select the Shared Connections option. |
![]() |
3 |
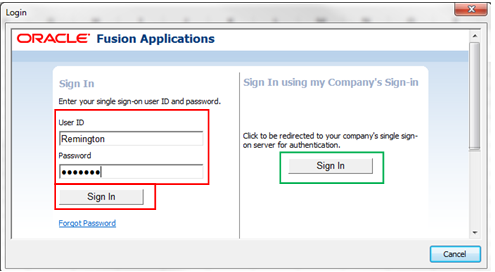
The Oracle Fusion Applications sign in window appears. Select Sign In in the Company’s Sign in section.
|
![]() |
4 |
The Smart View panel populates with the Shared Connections section. |
![]() |
5 |
Click the Shared Connections drop-down menu, then select Oracle® Essbase. |
![]() |
6 |
The Essbase data populates in Shared Connections. Select the desired data cube from the navigation tree. Select Ad hoc analysis. Note: Essbase Cubes house multiple types of data that is accessible using the Smart View Excel add-in. |
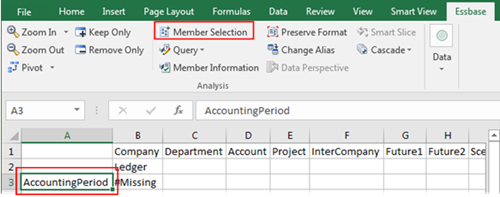
![]() |
7 |
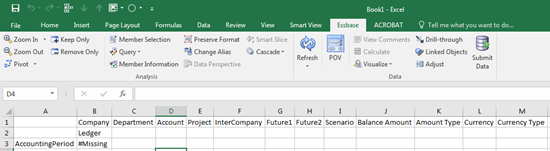
The Essbase ribbon and a data grid with Essbase cube dimensions (column headers) display.
Note: Data is not provided at this level. The dimensions must be configured in order for data to populate. |
![]() |
8 |
Proceed to Configuring Ad Hoc Analysis. | See Below. |
After the Essbase spreadsheet is loaded, the user must configure its members.
To configure spreadsheet members, perform the following:
Step |
Action |
Illustration |
1 |
Select the desired cell then Member Selection. | ![]() |
2 |
The Member Selection window appears. Perform the following to configure the Member Selection window: Navigate the member tree until you locate the desired member. Enable the desired member’s checkbox. Select the right arrow to add the member to the configuration |
![]() |
3 |
Repeat the process above if additional members are required. When all desired members are configured, select OK. Note: Member options vary depending on the column header selected. Repeat the previous steps to configure additional members |
![]() |
4 |
Select Refresh to retrieve data from the configured Essbase cube. |
![]() |
|
The configured data populates in Excel. |
![]() |
Updated 8/8/2018 JM