The following procedure demonstrates how to create an email filter based
on an email address and subject line.
Step |
Action |
Illustration |
1 |
Use the desired internet browser
(e.g., Firefox, Chrome) to login to your www.gmail.com
account. |
|
2 |
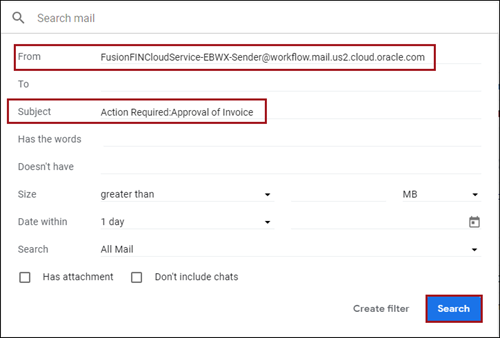
Locate
the search bar at the top of the screen and click the down arrow.
The
Search options fields display. |
 |
3 |
Complete
the following fields:
When
the search is configured, click Search.
Verify
the search only locates the desired emails. |
 |
4 |
Select the Search
down arrow to open the Search
fields. |
|
5 |
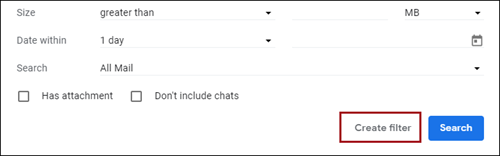
At the bottom of the Search
fields, click Create filter.
The filter options display. |
 |
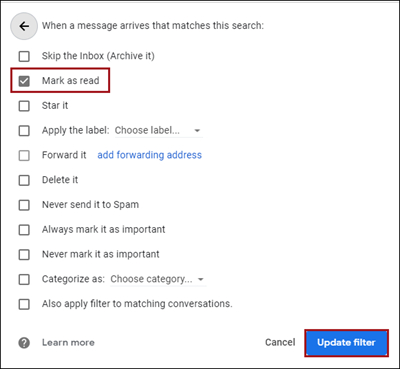
6 |
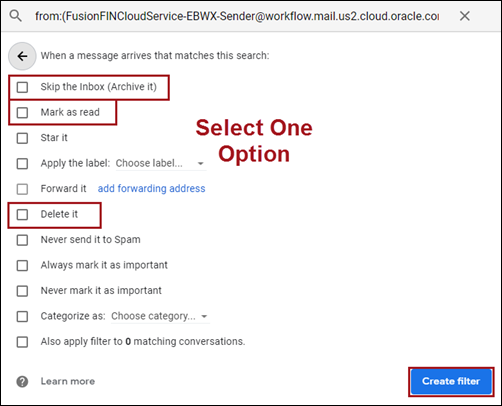
Select
a filter option from the list to enable the action. Below
are the most common selections:
Skip
the Inbox (Archive it): Archives
the emails Mark
as read: Puts the emails in your inbox as read messages Delete
It: Deletes
the emails
When
the selection is made, click Create
Filter. |
 |
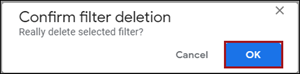
7 |
A confirmation message displays.
|
 |
Step |
Action |
Illustration |
1 |
Use the desired internet browser
(e.g., Firefox, Chrome) to login to your www.gmail.com
account. |
|
2 |
|
 |
3 |
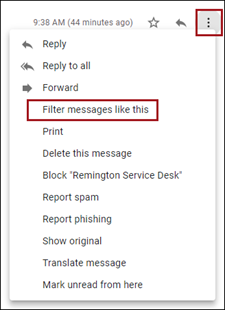
In the
More menu, select Filter Messages like this. |
 |
4 |
The Search options fields display.
Verify
the search results list shows the types of emails you wish to
filter.
|
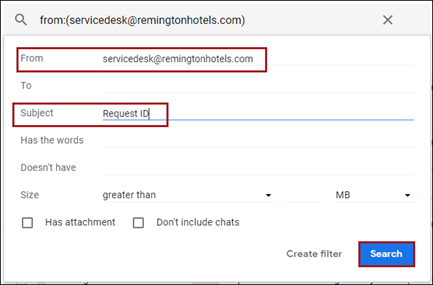 |
5 |
Select the Search
down arrow to open the Search
fields again. |
|
6 |
At the bottom of the Search
fields, click Create filter.
The filter options display. |
|
7 |
Select
a filter option from the list to enable the action. Below
are the most common selections:
Skip
the Inbox (Archive it): Archives
the emails Mark
as read: Puts the emails in your inbox as read messages Delete
It: Deletes
the emails
When
the selection is made, click Create
Filter. |
|
8 |
A confirmation message displays.
|
|
Perform the following to a delete a filter.
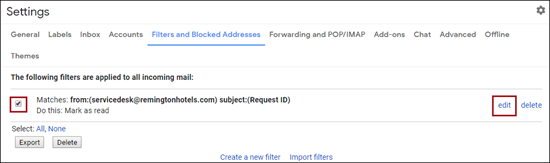
Perform the following to edit a filter.
Step |
Action |
Illustration |
1 |
Use the desired internet browser
(e.g., Firefox, Chrome) to login to your www.gmail.com
account. |
|
2 |
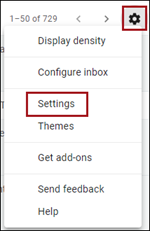
Click the
Settings button then the Settings option. |
 |
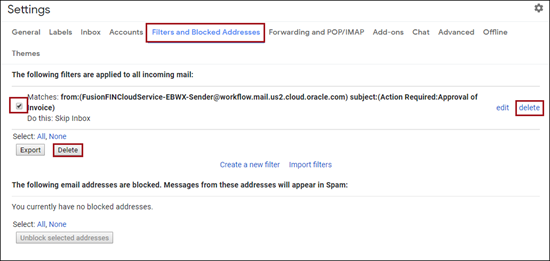
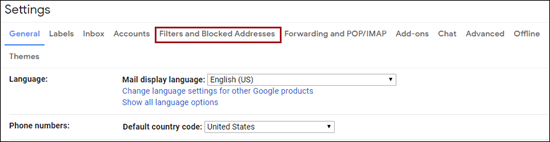
3 |
In the
Setting screen, select
the Filters and Blocked Addresses
tab. |
 |
4 |
On the
Filters and Blocked Addresses
screen .
|
 |
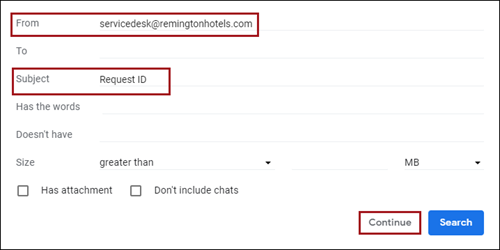
5 |
The Create
Filter screen displays. Make any changes needed
in the From or the Subject fields.
Click Continue to see
the options. |
 |
6 |
On the filter options screen,
make any changes needed.
When changes are completed, click Update
filter. |
 |
6 |
The update Confirmation
displays. |
 |