Oracle's Dunning feature provides a way for
you to send dunning letters to customers with unpaid transactions. The
dunning letters are emailed to the designated contact person at 30+, 60+,
and 90+ intervals, until the transaction has been paid or further action
has been taken. Before the dunning process can be used, companies
must have a designated contact and site.
Use the following steps to set up an existing customer with a designated
dunning contact.
| Step |
Action |
Illustration |
1 |
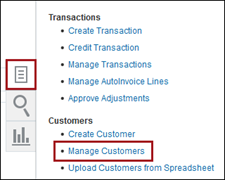
On the Billing
dashboard, click the Task
 icon and select Manage
Customers. icon and select Manage
Customers.
The Manage Customers
dashboard displays. |
 |
2 |
On the Manage
Customers dashboard, use the search fields to search for
an existing customer. |
 |
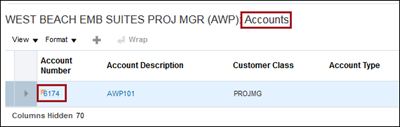
3 |
In the Search
Results, select the Customer
from the list and scroll down to the Account
or Site levels.
Click the Account
Number or
Site Number to edit the customer's information. |
 |
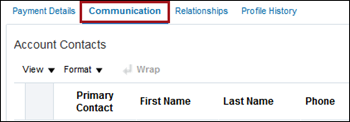
4 |
The Edit
Account screen displays. Scroll to the Account
Information tabs and click Communication. |
 |
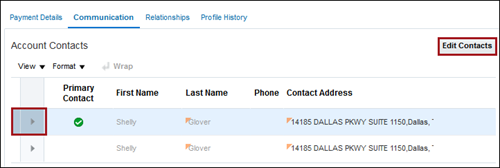
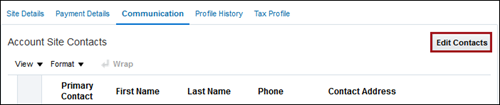
5 |
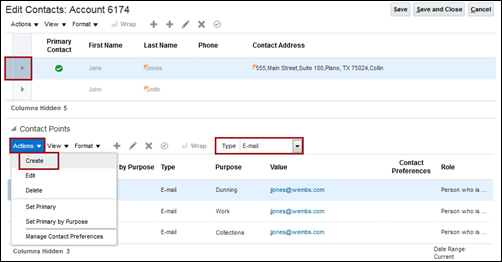
Select a contact and click Edit Contacts button. |
 |
6 |
Update
the Contact Points:
- Select the contact in the Contact List.
- In the Contact
Points section, select the Contact Type:
Email.
- Click Actions
and select Create.
The Create Contact
Point window displays. |
 |
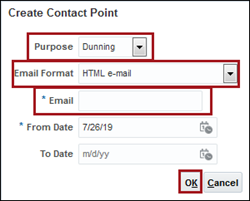
7 |
Complete the information on the
window.
Complete the following fields:
- Purpose:
Dunning
- Email
Format: HTML e-mail
- Email:
Enter the email address
The form fields depend on the contact type selected.
Click OK. |
 |
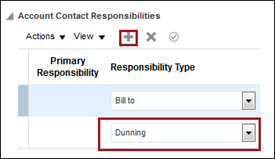
8 |
Scroll down the screen and in
the Account Contact Responsibilities
section, click the Add  icon to add a row in that section.
 |
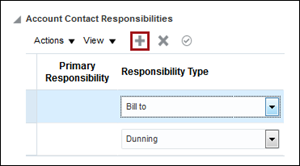 |
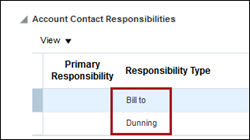
9 |
Click the arrow for the field
and select Dunning to
add the responsibility. |
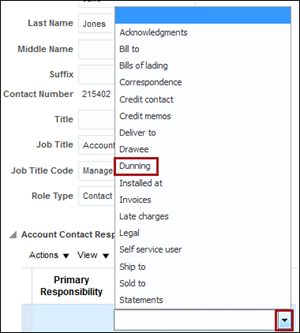 |
10 |
The contact is set up for both
the billing and the dunning notices. |
 |
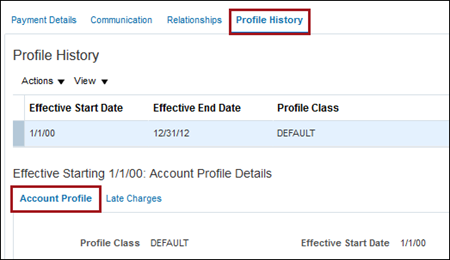
11 |
Click the account's Profile
History tab.
Click the Account
Profile tab in the section. |
 |
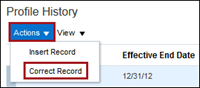
12 |
In the Actions
menu, select Correct Record.
Scroll down to the
Statement and Dunning section. |
 |
13 |
In the Statement
and Dunning section, Click the Send
Dunning Letters box. |
 |
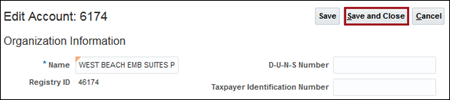
14 |
Click Save
and Close. |
 |
Follow the instructions below to set up the designated contact at the
site level.
| Step |
Action |
Illustration |
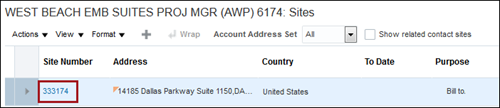
1 |
On the
Manage Customers screen, click the
Site Number to open the
Customer's Site |
 |
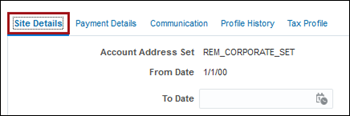
2 |
Scroll to the Account
Site section.
Click the Site
Details tab. |
 |
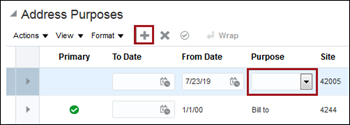
3 |
Scroll to the Address
Purposes.
Click the Add
icon.
Click the Purpose
arrow and select Dunning. |
 |
4 |
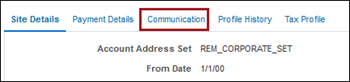
Click the
Site's Communications
tab.
Click the Edit
Contacts button. |
 |
5 |
Select a Contact
and scroll to the Account Contact
Responsibilities section and assign the Dunning
responsibility.
Skip to Step
9. |
 |
6 |
If a Site
Contact is not displayed, add the Contact
to the site.
Click Edit Contacts. |
 |
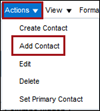
7 |
In the Action
menu, select Add Contact. |
 |
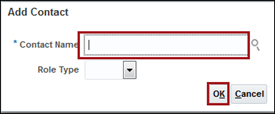
8 |
Enter the Contact Name in the
Contact Name field. Click
the Search  icon, if needed. icon, if needed.
Click Ok.
Complete the actions from Step
5 above to select the Dunning
responsibility. |
 |
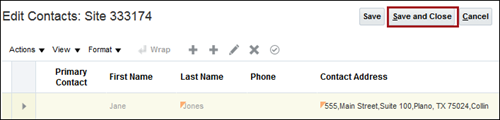
9 |
At the top of the Edit
Site Contacts screen, click Save
and Close. |
 |
10 |
On the Edit
Site screen, click Save
and Close. |
 |